Editor's note: John Barnett is president and founder of Barnett Bicycle Institute in Colorado Springs, Colorado. Aside from being a bicycle mechanic instructor, he's author of Barnett's Manual DX, a comprehensive guide to bicycle repair and maintenance. He supplied this detailed "how-to" on adjusting a quick release following the industrywide recall action in late September.
By John Barnett
Few manufacturers provide quantifiable specifications for setting the quick-release wheel-retention mechanisms they make. Fortunately, equipped with just a measuring caliper and a key bit of critical information, any mechanic can determine the proper tension setting for any QR mechanism, and be reasonably able to communicate that setting to a customer.
Working backward from QR-lever torque specifications published by a reputable manufacturer, Barnett Bicycle Institute has determined that the distance between the QR adjusting nut and the QR lever nut should change by a minimum of 0.6 millimeters from the point that clamping starts until the lever closes to its mechanical limit. Clamping starts at the point in the lever travel that both dropouts are simultaneously in contact with both QR nuts and with both faces of the axle assembly.
Because an axle can't compress by this 0.6-millimeter amount, achieving this setting actually elastically stretches the QR shaft. The stretching creates the tension that causes the axle and QR nuts to grip the dropouts with sufficient friction. As long as the QR shaft material is steel and the shaft diameter measures 5 millimeters, the tension force created by stretching the shaft 0.6 millimeters remains nearly constant.
While this "stretch" cannot be effectively measured with the wheel installed, a practical workaround test process exists:
• Install the QR mechanism into the dropouts without the wheel.
• With the QR lever fully open, tighten the adjusting nut until the dropouts compress toward each other several millimeters, then close the lever to its mechanical limit (observe its alignment).
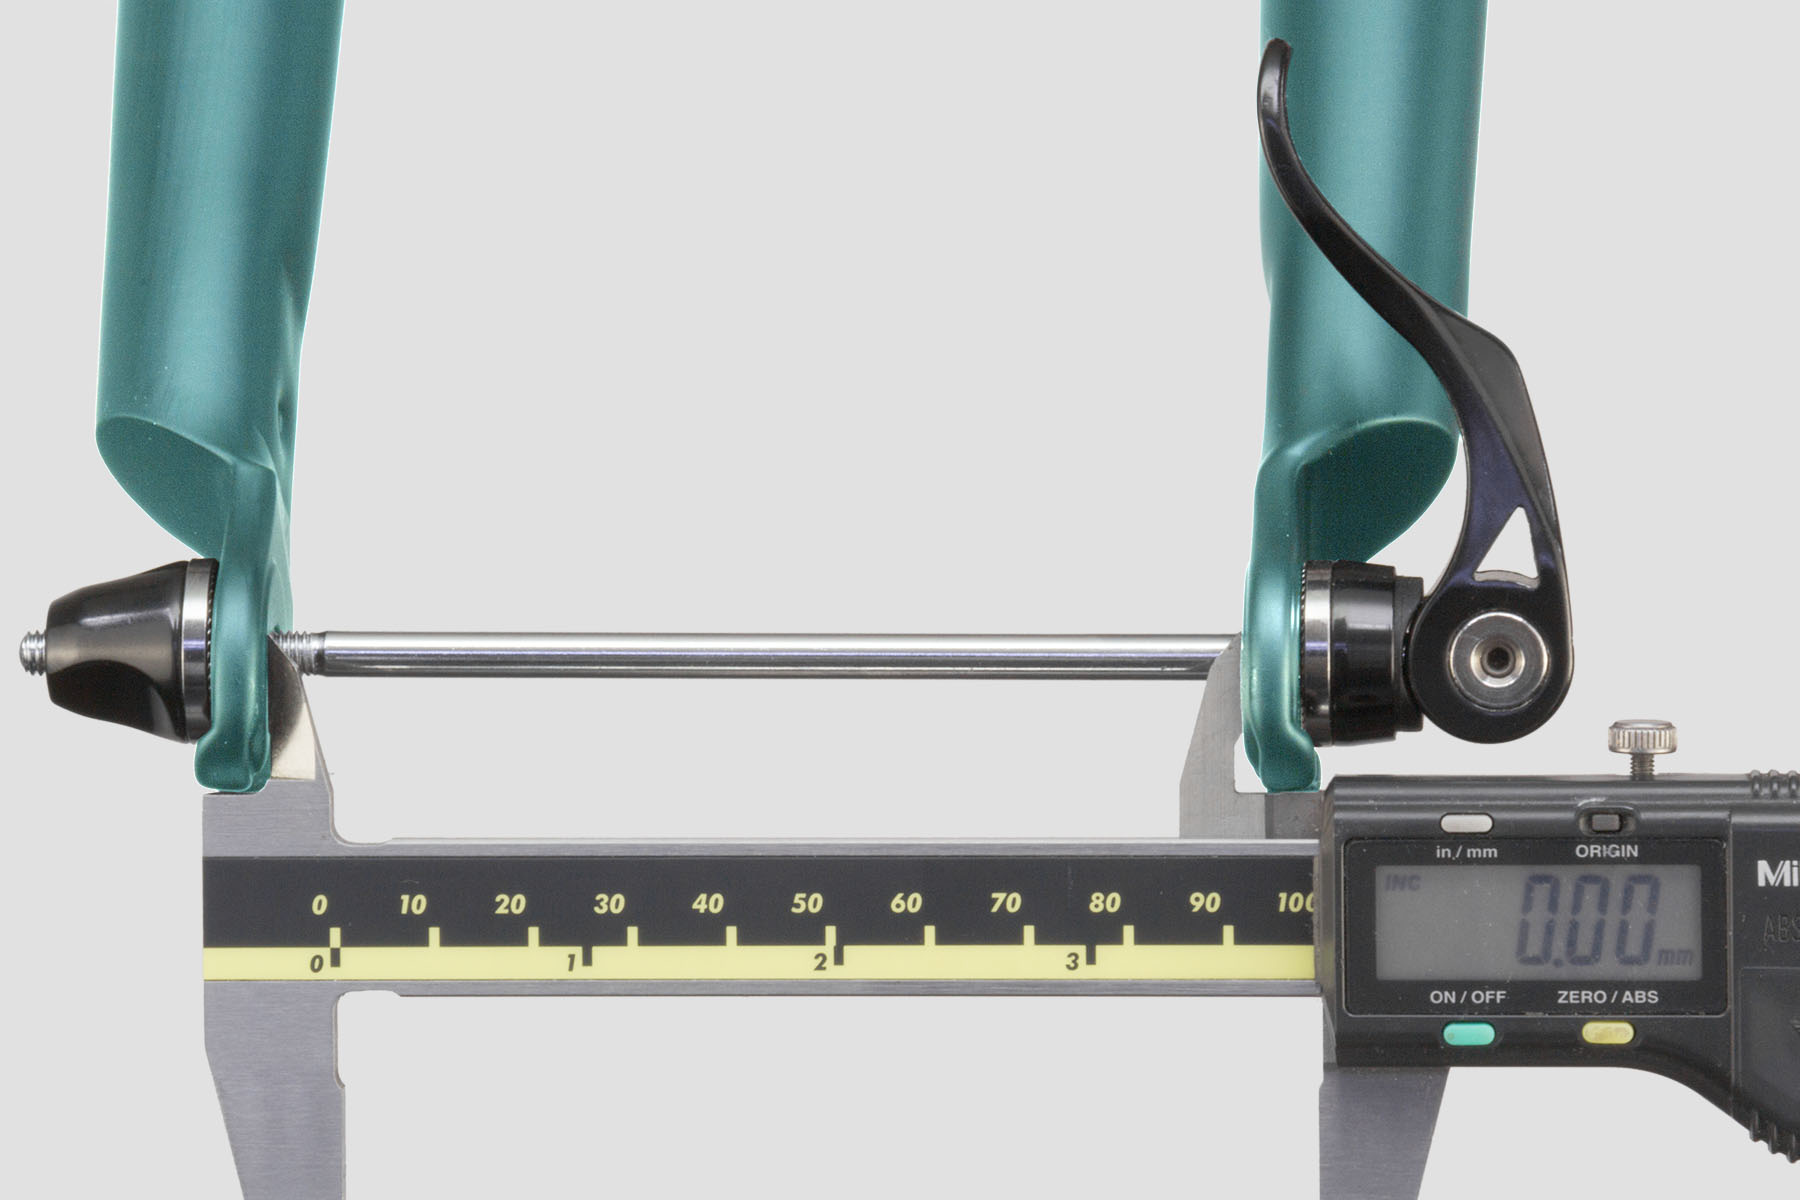
• Engage a measuring caliper snugly between the dropouts, then press the caliper's "zero" button.
At this point, your setup should match the first image below.

Next:
• Slowly open the QR lever while simultaneously spreading the caliper to maintain snug contact to the faces of the dropouts.
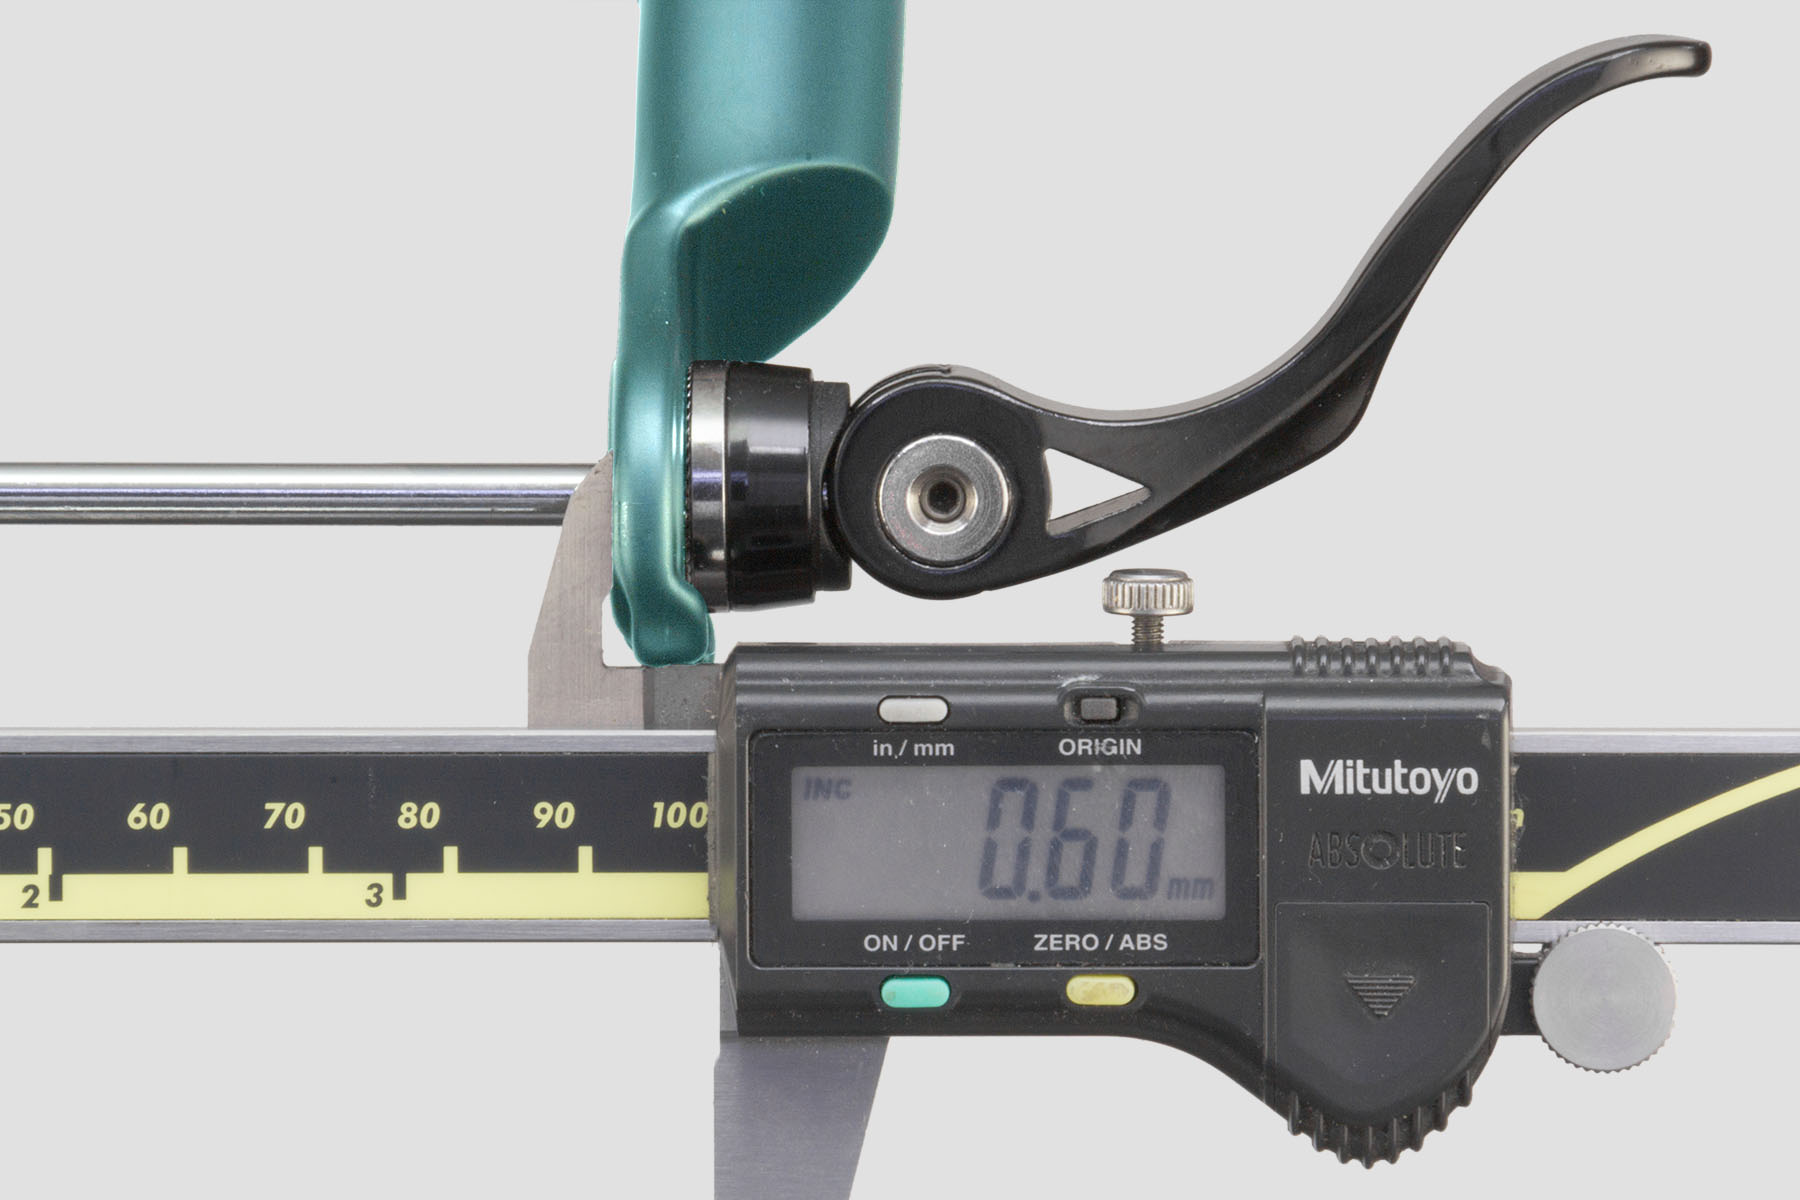
• Stop opening the QR lever when the caliper reads 0.6 millimeters, then observe the alignment of the lever.
At this point, your setup should match the second image below (except that the actual alignment of your lever will differ, depending its brand and model).
This test process determines the desired "initial resistance point." When installing a wheel, adjust the QR adjusting nut so that as you close the QR lever, at the moment the QR nuts, dropouts and faces of the axle assembly begin to stack up against each other, you first observe resistance to further lever closure precisely when the alignment of the lever matches the "initial resistance point" determined during the test process.
Finally, be sure to close the lever to its mechanical limit (without any portion of the lever contacting the fork or any adjacent frame part). For sake of the user's ease of opening the QR lever, position the lever tip about one-half inch away from the fork or adjacent frame part.

When training customers how to install QR wheels, show them the lever position at which resistance should first be encountered. Have them open and fully close the lever several times at your setting, while having them observe the lever position at which resistance begins, the peak effort required to close the lever, and also what sort of palm imprint they experience (or not). After having them experience this several times at your setting, have them loosen and reset the adjusting nut several times until they demonstrate a consistent ability to replicate the correct setting.
Given the PR beating this industry keeps taking on QR mechanisms, now that you understand what constitutes a proper setting, there should be no lack of motivation to get this right both at the bench and on the sales floor.


